
A pass is a layer of sculpting on top of a shape. Add a pass, sculpt the wrinkles into it, and the wrinkles stay separate from the head underneath: turn the pass down to 40% and they soften, hide it and the head is as it was before you started, delete it and they are gone. Nothing under the pass is ever touched.
Passes live in the Passes section of the panel, under Layers. They belong to the active layer: each layer has its own stack.
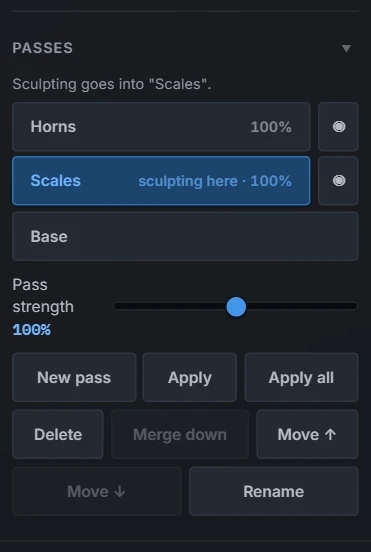
Sculpt into a pass
- Press New pass. A row appears above Base, marked sculpting here.
- Sculpt as you always do. Every brush works: what you sculpt goes into the pass.
- Add another pass for the next kind of detail, and so on.
Click a row to choose where sculpting goes: a pass, or the Base, the shape under all of them. The line at the top of the section always says where it is going.
Tools that move the surface without a brush (Reshape, Surface noise, a masked move with the gizmo) go into the row you are sculpting into as well.
Turn a pass down, hide it, bring it back
Select a pass by clicking its row. Then:
- Pass strength sets how much of it shows. 100% is the pass exactly as you sculpted it, 0% is as if you never had, and anything up to 200% pushes it further than you sculpted. The model follows the slider as you drag.
- The eye hides the pass and shows it again. Hidden, it changes nothing, and it is all still there when you show it.
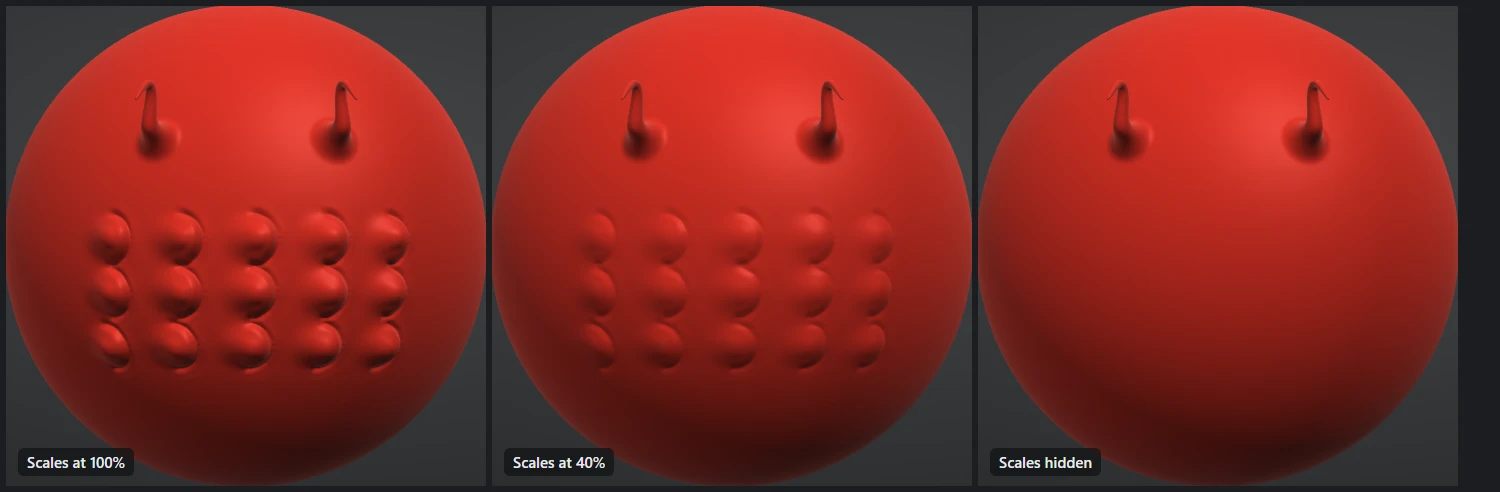
A pass that shows nothing (hidden, or at 0%) cannot be sculpted into, because you would not see what you were doing. When you hide the pass you are sculpting into, sculpting moves to the Base, and the panel says so.
You can sculpt into a pass while it is turned down. The stroke looks the way you make it; turn the pass back up later and that stroke grows with the rest.
Tidy the stack
- Apply puts the selected pass into the Base as it shows now, at its current strength. The shape does not change; the pass is simply no longer separate.
- Apply all does that for every pass on the layer.
- Delete removes the selected pass and everything sculpted into it.
- Merge down joins the selected pass into the one under it. The shape does not change.
- Move ↑ and Move ↓ reorder the list, and Rename (or a double-click on a row) names a pass. Neither changes the shape.
Every one of these is one step for Undo, including a whole drag of the strength slider.
What passes follow, and what applies them
Passes go wherever their layer goes:
- Switching layers, Duplicate and Mirror keep them. A duplicate has the same passes; a mirrored layer has them mirrored.
- Moving, turning and scaling the layer with the gizmo carries them along.
- They are saved with the project, in every autosave, and come back when you open it.
Passes belong to the points of the mesh they were sculpted on. Anything that replaces those points applies the passes first: the shape stays exactly as it is, and they stop being separate.
- Subdivide and stepping down a level ask before they do it. Undo brings the level back, but not the passes, so decide before you press.
- Remesh, Decimate, Clip, Boolean, Hollow, Live Topology, and merging or splitting layers apply them and say so.
So the usual way to work is to settle the level first, then add passes for the detail on top.
While the History slider is at an earlier point, the layer is shown with its passes applied and they cannot be changed. Drag History back to Now and they are exactly as you left them.
Good to know
- Passes hold shape only. Paint and mask are not part of a pass.
- A layer holds up to 16 passes.
- Each pass remembers a move for every point of the layer, so a pass on a very dense layer takes memory. Passes work on layers of up to 16 million points.
- A project with passes needs this version of Re:Form or later to open.