
Screenshots show your viewport; renders show your sculpt. The Render menu produces presentation-quality output — supersampled stills with studio lighting and ambient occlusion, and looping turntable videos — without the scaffolding (grids, guides, cursor) that lives in the working view.
Render image
Render ▸ Render image opens the render dialog. The framing is exactly what your viewport shows, and the preview is a true preview — a real render at thumbnail size through the identical pipeline, so it can't lie about the result. Drag the preview to orbit, right-drag to pan, wheel to zoom — or click it to refresh.
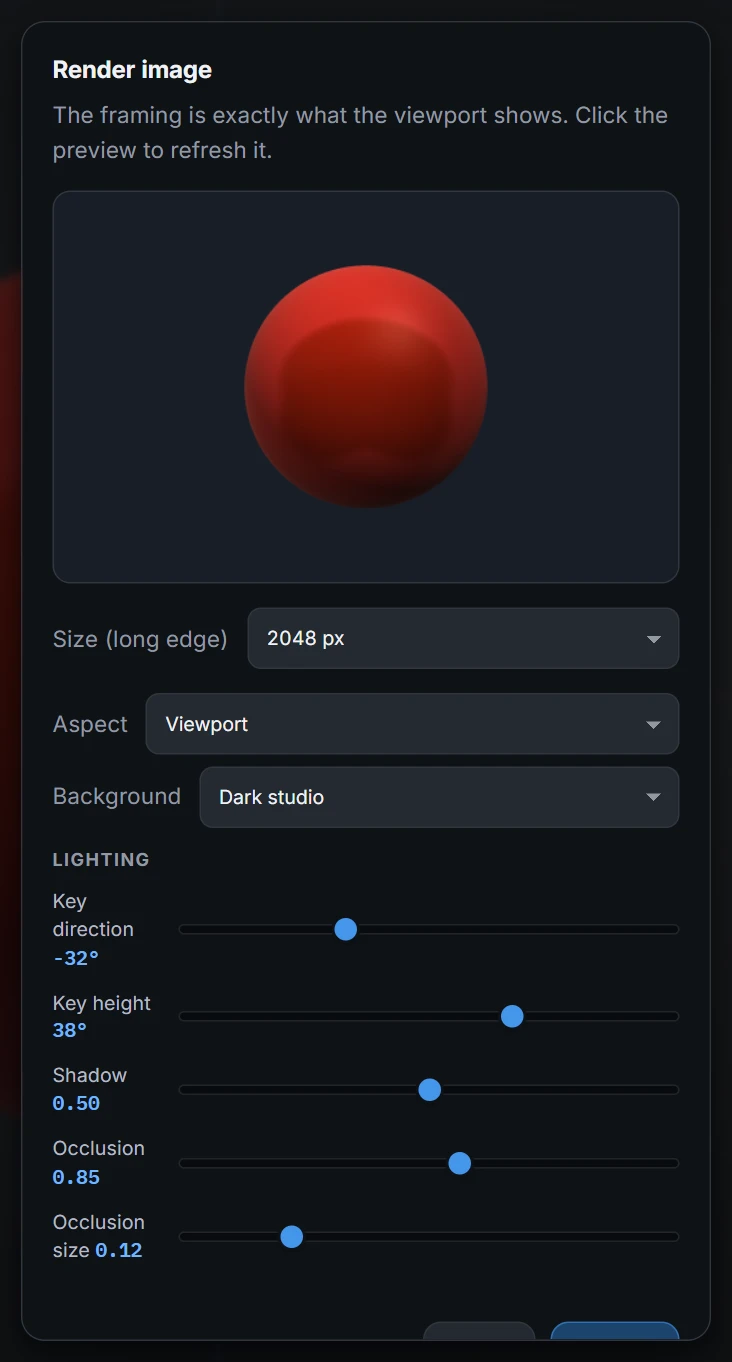
The options:
- Size — 1024 or 2048 pixels on the long edge, or 4096 and 8192 (8K) Pro. Smaller sizes are rendered larger and scaled down for clean edges; 8K is rendered at its full size.
- Anti-aliasing — Standard, High (4 passes) or Very high (16 passes). Each pass renders the image again with the view nudged by a fraction of a pixel, and the passes are averaged, so edges come out smoother and the shading grain softens. It shows most at 4096 and 8K; High takes about four times as long, Very high about sixteen.
- Aspect — match the viewport, or render an exact ratio: square, 4:3, 3:4, 16:9, 9:16.
- Background — the dark studio, transparent (for compositing anywhere), black, white, any solid colour, or a two-colour linear/radial gradient. Gradients carry a faint, fixed grain so they stay smooth instead of banding, in stills and in videos.
- Image and HDRI backgrounds — choose Image to put a picture behind the model, scaled to fill the frame. Choose HDRI (360°) to load a
.hdrfile or a JPEG / PNG 360° panorama; it wraps around the scene, turns with the camera in turntables, and has its own Rotation and Exposure sliders. Blur softens an Image or HDRI background behind the model, like a camera focused on the sculpt. Loaded files last for the session. - Lighting — the render's own key light (direction and height), Shadow strength, and screen-space Occlusion (strength, contrast and size) — the contact shading that makes forms sit into themselves. Occlusion contrast deepens the crevices. Brightness sets the overall exposure of the lit render — 1 matches the viewport, lower is darker, higher is brighter.
Press Render, and the finished image opens in a result dialog — name it and save. Renders respect your shading mode: Matcap renders the sculpt look; Lit renders your painted materials under the light rig.
Render types
The Type at the top of the dialog chooses what the image shows. The preview follows it.
- Beauty — the shaded render described above. It is the default and renders exactly as it always has.
- Silhouette — the shape alone, in flat black on white, with the same framing and anti-aliasing as Beauty. Handy for checking the read of a pose or for 2D work.
- Depth — a height image of the model: its nearest point white, its farthest point black, the background black. The grey range comes from the model itself (the front and back of its bounds along the view), not from the camera, so the whole range of grey is used however far away the camera is. Depth file picks a 16-bit PNG (the default) — 65,536 levels, so a gentle slope stays smooth instead of stepping when you use the image as a height or displacement map — or an ordinary 8-bit PNG.
- Normal — which way every part of the surface faces, as colour: red is right, green is up, blue is toward you, so a surface facing the camera is (128, 128, 255). It is smooth across the triangles at any density, and the background is that flat facing colour.
Depth and Normal are orthographic: they look straight along the view, centred where the view is centred and as tall as the view is at its centre, with no perspective. A Depth and a Normal of the same view line up pixel for pixel. Size and Aspect apply to every type; Background and Lighting belong to Beauty and hide for the others, and Anti-aliasing hides for Depth and Normal (their pixels are measurements, not blended). The watermark follows the same rules as Beauty; on a 16-bit Depth the mark is part of the height values too.
Render turntable
Render ▸ Render turntable circles the camera around the sculpt as a looping video, from the current view — set the revolution length and how many revolutions (5 seconds × 5 revolutions is a 25-second video), with the same anti-aliasing, aspect, background and lighting choices as a rendered image — the classic way to show a sculpt online. It's on every plan; Free turntables carry the small Re:Form mark.
- Size — 512, 1024 or 2048 pixels.
- Length — 4, 6 or 8 seconds for the revolution.
- The same aspect, background and lighting controls as stills, shared between both dialogs.
The result saves as an MP4 (H.264) that posts anywhere video does.
Record timelapse
Render ▸ Record timelapse records your session while you sculpt and turns it into a short video to post. Record chooses what goes in it: the Rendered view (the sculpt alone, lit, on your chosen background) or the Whole window, the app exactly as you see it with the interface, panels and cursor, for showing Re:Form itself. The whole window is recorded through your browser's screen sharing: Choose what to share asks which tab or window to share and shows a preview of what will be recorded (click it for a new snapshot), and Start recording uses that share; stopping the share finishes the recording. Pick the resolution (720p or 1080p) and, for the rendered view, the aspect (16:9, 1:1 or 9:16 — each rendered at that shape, not cropped), the frame rate, how often to capture a frame (every 0.5, 1 or 2 seconds, 1 by default — more often gives a slower, smoother video), Smoothing (an in-between frame that dissolves from one capture to the next, so big changes glide instead of snapping), Anti-aliasing (Standard, or High: each capture rendered 4 times and averaged for smoother edges), Sharpness (lower softens the fine grain and sparkle of the lighting; the background and watermark stay crisp), Pause while turning the view (no frames while you orbit, pan or zoom, so the video cuts cleanly to the new angle), about how long the video should be, Keep mesh centred so panning never pushes the sculpt out of a portrait frame, Show capture frame to outline in the viewport exactly what is recorded, and Show reference images to record your reference images as the viewport shows them (Ortho views with References on; off by default). The background, lighting and preview are the same as in Render image and Render turntable: drag the preview to orbit, Shift-drag or right-drag to pan, and scroll to zoom, and it shows exactly what each frame records.
- A small rec line at the bottom left of the viewport shows the frames, the capture interval and the video length so far; Frame: On / Off shows or hides a dashed outline in the viewport of exactly what is recorded, and the red Stop & export button finishes.
- Idle time is skipped, and long sessions slow the capture down so the video stays short. Grids, the floor and reference planes are left out, as in a render.
- Stop & export saves the video. A very long recording is split into parts, and you are asked to save each part as it fills.
- The recording lives in the tab until you export it — reloading or starting a new sculpt asks first.
Watermark
Rendered images, turntables and timelapses on the Free plan carry a small Re:Form mark in the bottom-right corner; it turns dark on light backgrounds so it stays readable. On Pro the mark is optional: choose no watermark, the Re:Form mark, your own text or your own logo, and set its position, size, opacity, colour and margin in the Watermark section of any render or timelapse dialog. Your models themselves — mesh exports and .clay saves — are never watermarked on any plan.
Your render settings — aspect, background, lighting — persist with the project, so re-rendering after another sculpting session picks up the exact same look.